
Of course, the hardest part of modifying this sweater is getting the appropriate amount of stitches for the yoke. Lucky for you, dear reader, I did all that work and will give you the formula.
The basic formula for the number of stitches needed for the cable yoke section as charted is as follows: multiple of 20 stitches plus 36. Use this formula if you’re knitting the cardigan version. For the pullover, I added an extra 5 stitches, to make up for the lack of a button band, so my formula was: multiple of 20 stitches plus 41 stitches.
Want to see how it all breaks down? Here’s the schematic I used:
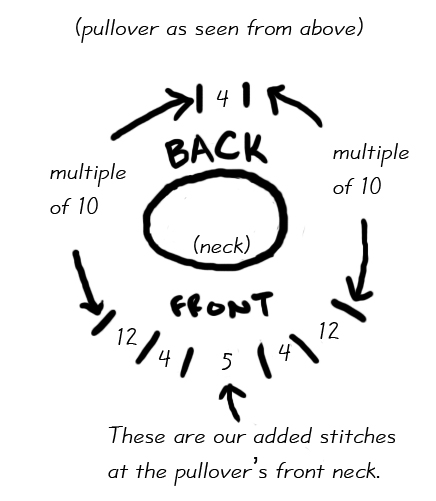
The four stitches at either side of the 5-stitch centre are written into the pattern, and the cable chart starts (and ends) at the 12-stitch section. Since it's in the round, you don't need to purl the non-cabled rows, but watch for the increases and decreases which are between the cable-knit rows.
I decided, based on my gauge, how many stitches to go with on the cabled section, which worked perfectly both times I did the cable, despite messing up the actual body measurements the first time.
(Version One
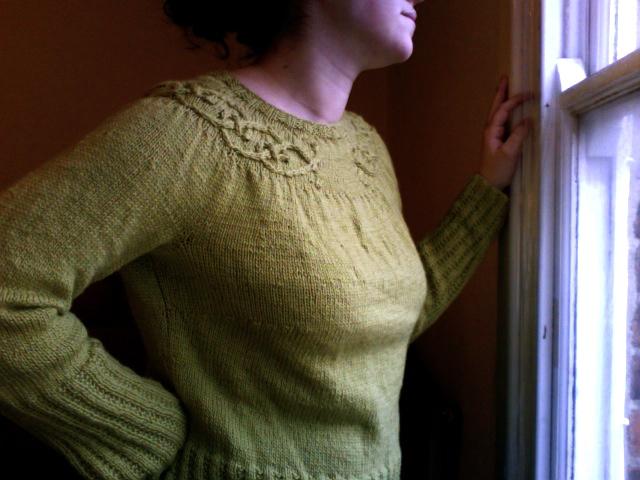
was much too large at the upperbust, resulting in me pulling it back to the armpits of the sleeves and the waist of the body. I added shortrows for the bust which worked a treat. I also decided that I wanted the cable ON my shoulders, instead of around it, resulting in modifications and major short-rowing that I'll talk about next time...)

No comments:
Post a Comment