to this dress:

without taking the original apart!
First I laid the dress flat onto the floor. This was originally an "easy" pattern, and I knew that the grain line of the dress was straight up and down. I matched the grain line of the muslin to the dress and pinned the two together. Then I carefully rubbed over all the seams with tailor's chalk, which is what you see here.

I did this for five pattern pieces, the four that made up the body of the dress, and the sleeve cap. I didn't bother with the belt as it was just straight and long.
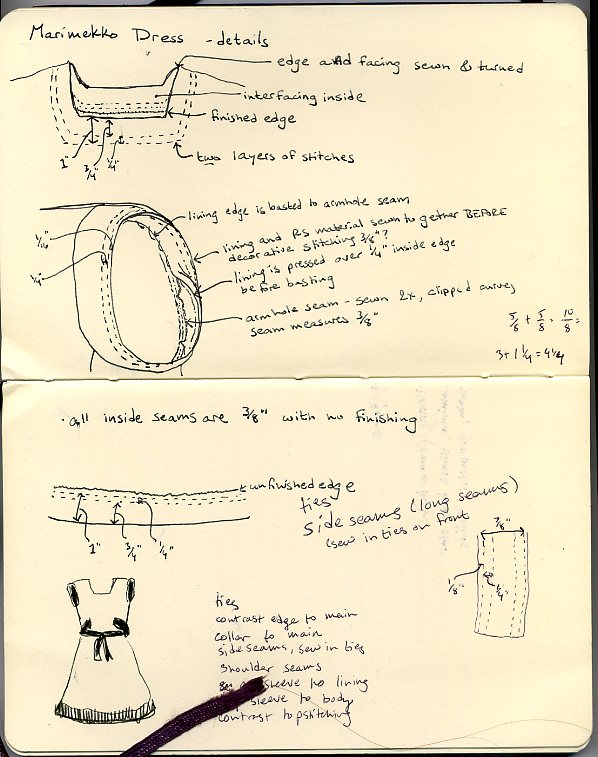
Then I sat down with the dress and made extensive notes on construction.

I bought some pattern paper and dressmaker's carbon and worked to fix the details of the rub-off,

before transferring it to pattern paper.

You can see above that this is where I added in separate pattern lines for the contrast hem. I folded the pattern vertically for the front and back pieces so that the pattern would be symmetrical. I made certain that the pockets and the neckline were the same shape and would line up.
Then, it's just like any other pattern: transferring it to fabric, and sewing it up. My biggest problems were with the sleeve caps, which had been hard to make a rub-off of. I fought with them for two and a half hours before successfully sewing them!
Now I have a dress pattern which I can copy or modify to my heart's content.
(The original dress was sewn in 1980 by my mother, of Marimekko fabric in the "Dombra" pattern. Despite all my efforts, I have never been able to locate the pattern.)


2 comments:
Hi, it was nice to meet you at i-knit day today (we discussed your version of tangled yoke).
That looks like an interesting way of making a dress.
found your fabric (not the same color exactly, but here it is!)
http://www.amazon.com/Marimekko-Dombra-Fabric-Grey-Black/dp/B003UWNJ6M
Post a Comment